7 Signs It’s Time to Repaint Your Commercial Building

A well-maintained exterior for your commercial building speaks volumes about your professionalism and attention to detail. One of the simplest yet most impactful ways to maintain your building’s appeal is through regular painting. But how do you know when it’s time for a fresh coat? Here are seven signs to watch out for:

1. Fading or Discoloration

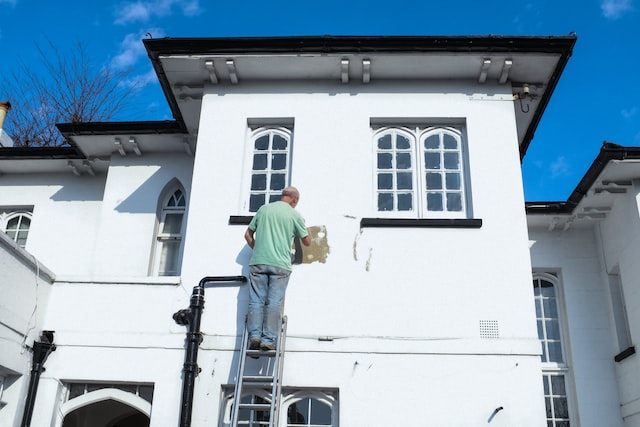
The exterior paint of your commercial building is constantly exposed to harsh elements like sunlight, rain, and pollution. Over time, these factors can cause the paint to fade or develop unsightly discoloration. If you notice dull patches or uneven coloration, your building must be repainted. 

2. Peeling or Flaking Paint

Peeling or flaking paint is not just an aesthetic issue; it can also signal underlying structural problems. When paint begins to peel, it compromises the integrity of the protective layer, which leaves your building vulnerable to moisture infiltration and decay. Addressing this issue promptly by repainting will not only enhance the appearance of your building but also safeguard its structural integrity for years to come.

3. Cracks or Blisters

Cracks and blisters in the paint may seem minor initially, but they can quickly escalate into more significant issues if left unattended. These imperfections detract from your building’s curb appeal and serve as entry points for moisture, leading to potential water damage and mold growth. Repainting your commercial building will seal these cracks and blisters and prevent further deterioration.

4. Visible Wear and Tear

As your commercial building ages, it naturally experiences wear and tear from foot traffic, environmental factors, and other sources. This wear and tear can manifest as scuff marks, scratches, or stains on the exterior surfaces. A fresh coat of paint can effectively conceal these imperfections, giving your building a renewed appearance that reflects positively on your business.

5. Outdated Color Scheme

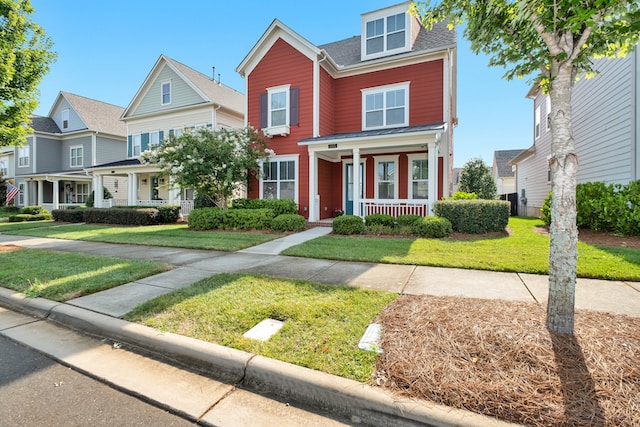
Trends in architectural design and color palettes evolve, and what may have been stylish a decade ago could now appear outdated. If your commercial building’s color scheme looks passé compared to newer properties in the area, it might be time for a modern update. Repainting allows you to revitalize your building’s look, making it more appealing to potential customers and tenants.

6. Environmental Damage

Extreme weather events, such as storms, hurricanes, or heavy winds, can cause significant damage to your building’s exterior. From chipped paint to dented siding, these environmental factors can detract from your building’s overall appearance and leave it vulnerable to further deterioration. 

7. Increased Maintenance Costs

If you find yourself spending more time and money on frequent touch-ups and repairs, it may be more cost-effective in the long run to invest in a full repaint. Continuously patching up small areas of peeling or damaged paint can become a never-ending cycle that drains your resources. Proactively repainting your commercial building can minimize maintenance costs and ensure a more durable and visually appealing exterior.

Refresh Your Commercial Building Today

Your commercial building’s exterior is the first impression for potential customers, clients, and tenants. By recognizing the signs that it’s time to repaint, you can enhance its appearance, protect its structural integrity, and maintain its value over time. Don’t wait until the damage becomes extensive; schedule a repaint today and invest in the long-term success of your business.
Painting Kitchen Cabinets Like a Pro: A Step-by-Step Tutorial

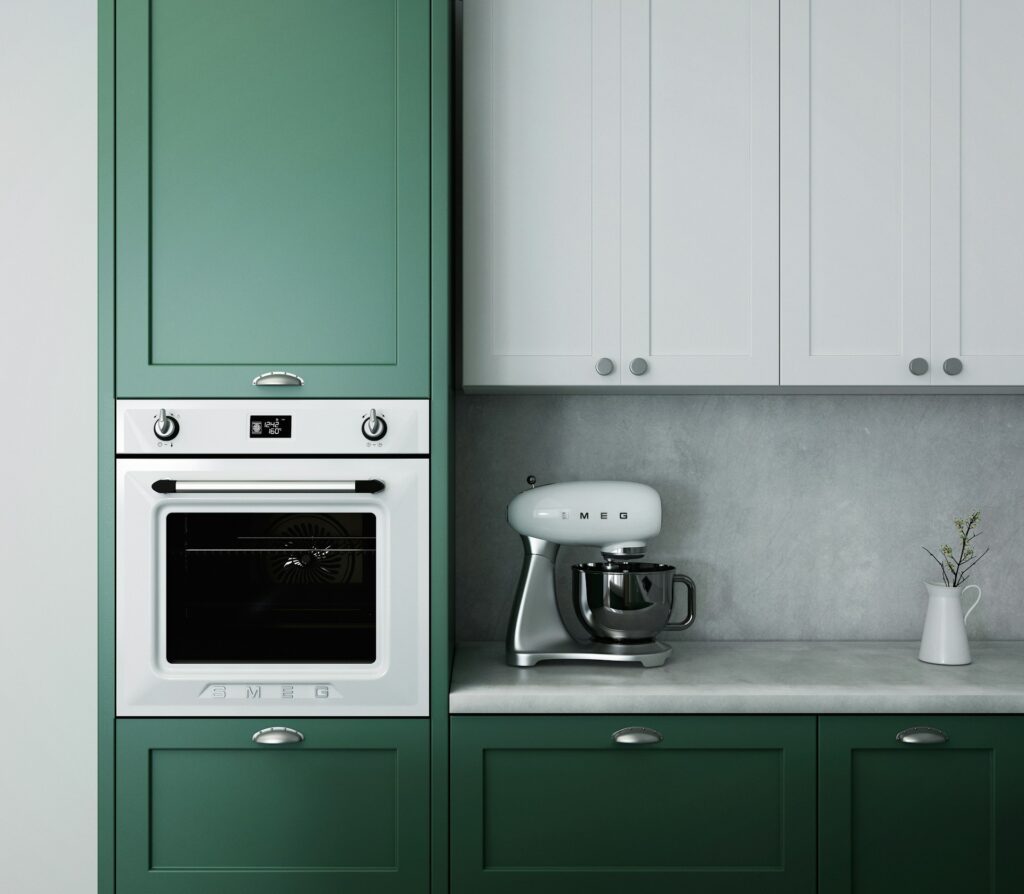
The kitchen is the heart of every home, and a simple upgrade like painting your cabinets can breathe new life into the space. Whether you’re looking to modernize outdated cabinets or add a splash of color to a neutral kitchen, this step-by-step tutorial will guide you through the process of painting kitchen cabinets like a professional. With the right tools, preparation, and technique, you can achieve a flawless finish that transforms your kitchen into a stylish and inviting space.

Step 1: Planning and Preparation

Before diving into the painting process, thorough planning and preparation are essential. Start by removing all cabinet doors, drawers, and hardware. Label each piece with a corresponding number to ensure a seamless reassembly later. Clean all surfaces with a mild detergent to remove grease and grime. If your cabinets have existing finish, sand them lightly to create a smooth surface for the new paint to adhere.

Step 2: Choose the Right Paint and Tools

Selecting the right paint and tools is crucial for achieving a professional-looking finish. Opt for a high-quality, durable enamel paint in a finish that suits your style – satin or semi-gloss are popular choices for kitchen cabinets. Invest in good-quality brushes and rollers to ensure even coverage and minimize streaks or brush marks.

Step 3: Prime for Success

Priming is a step that should not be overlooked. It provides a smooth base for the paint to adhere to and enhances durability. Choose a bonding primer specifically designed for cabinets to ensure maximum adhesion. Apply the primer evenly with a brush or roller, paying attention to details and corners.

Step 4: Fill and Sand

Inspect the cabinets for any imperfections, dents, or holes. Use a wood filler to patch these areas and sand the surfaces once the filler is dry. Sanding between coats is also essential for achieving a smooth finish. Use fine-grit sandpaper to buff the surfaces, removing any rough spots or brush marks.

Step 5: Paint with Precision

Now comes the exciting part – painting your cabinets! Start with the inside edges and framework before moving on to the larger surfaces. Use long, even strokes to prevent streaks, and always follow the wood grain. Be patient and allow each coat to dry thoroughly before applying the next. Depending on the color and type of paint, multiple coats may be necessary for full coverage.

Step 6: Apply a Topcoat

For added protection and a professional finish, consider applying a topcoat. A clear polyurethane topcoat will protect your newly painted cabinets from daily wear and tear, making them easier to clean and maintain over time. Choose a water-based topcoat for quicker drying and low odor.

Step 7: Reassemble and Enjoy

Once the paint and topcoat have dried completely, carefully reattach the cabinet doors, drawers, and hardware. Take your time with reassembly to ensure proper alignment and functionality. Step back and admire your newly painted kitchen cabinets – a testament to your DIY skills.

Conclusion

Painting kitchen cabinets is a rewarding DIY project that can transform the heart of your home. By following these step-by-step instructions and investing time in proper preparation, you can achieve a professional finish that will revitalize your kitchen and leave a lasting impression. Get ready to enjoy the satisfaction of a kitchen makeover without the hefty price tag – it’s time to unleash your inner pro!

Painting Mistakes That Could Drain Your Wallet: Are You Making These Costly Blunders?

Imagine this: You’ve embarked on a journey to transform your living space, armed with paintbrushes, rollers, and a vision of a beautifully revamped home. But what if the very strokes of color meant to enhance your space were secretly draining your wallet? 

Ignoring Proper Prep Work

One of the most common—and costly—mistakes is neglecting proper preparation before painting. Skipping steps like cleaning walls, patching holes, and priming surfaces can lead to uneven paint application and a shorter lifespan for your paint job. Investing time in thorough prep work ensures a smooth, long-lasting finish that won’t require premature touch-ups.

Choosing the Wrong Paint

Selecting the wrong type of paint is a classic misstep that can wreak havoc on your budget. Using interior paint for exterior surfaces or vice versa can result in peeling, fading, and a paint job that simply won’t stand the test of time. Learn to decipher paint labels and choose the right product for each specific area of your home to avoid costly do-overs.

Underestimating the Power of Primer

Many DIY enthusiasts underestimate the importance of primer in the painting process. Primer acts as a foundation for your paint, ensuring better adhesion and durability. Skipping this crucial step might mean more coats of paint are needed, leading to increased expenses in both time and money.

Rushing the Drying Process

Impatience can be a costly trait when it comes to painting. Rushing the drying process between coats can result in a streaky, uneven finish. Take the time to allow each layer to dry thoroughly before applying the next. It may require a bit more patience, but the result will be a professional-looking paint job that stands the test of time.

Overlooking Surface Preparation

Different surfaces require different preparation techniques. Whether you’re painting wood, drywall, or metal, overlooking the unique needs of each surface can lead to adhesion issues and paint failure. Invest the time to understand the specific requirements for the surfaces you’re working with to ensure a flawless finish.

Neglecting Weather Conditions

Painting is not just a fair-weather activity. Ignoring the impact of temperature and humidity on your paint job can be a costly mistake. Extreme weather conditions can affect drying times, adhesion, and the overall quality of your finish. Plan your painting projects according to weather forecasts to avoid unexpected setbacks and additional costs.

Skimping on Quality Tools

Investing in high-quality paint and brushes is only part of the equation. Using cheap or worn-out tools can result in a sloppy finish that requires more touch-ups and, ultimately, more paint. Quality tools not only make the job easier but also contribute to a more professional-looking result that will stand the test of time.

Conclusion

Your dream home shouldn’t come at the cost of a drained wallet. By avoiding these common painting mistakes, you can embark on your DIY projects with confidence, knowing that your investment will yield lasting, beautiful results. Take the time to prep, choose the right products, and pay attention to the details. Your home—and your budget—will thank you.

How to Paint a Perfectly Striped Wall: Tips and Tricks

A striped wall can add visual interest, depth, and a touch of sophistication to any room. Whether you’re aiming for classic, bold, or subtle stripes, painting them perfectly requires precision and the right techniques. In this article, we’ll guide you through the steps and offer tips and tricks to help you achieve flawless stripes on your walls.

Planning and Preparation

1. Choose Your Colors

Select two contrasting colors that complement your room’s decor. You can opt for classic black and white stripes, bold primary colors, or soft pastels—whatever suits your style.

2. Measure and Mark

Decide on the width of your stripes and use a measuring tape and a level to mark straight, evenly spaced lines on the wall. Remember that the width of your stripes will also determine the amount of paint you’ll need.

3. Gather Your Supplies

You’ll need the following supplies for this project:

  • Paint in your chosen colors
  • Paint rollers and trays
  • Painter’s tape
  • Drop cloths or plastic sheets
  • Measuring tape
  • Level
  • Paintbrush
  • Pencil

Painting Perfect Stripes

1. Prep the Wall

  • Remove any furniture from the room or cover it with drop cloths.
  • Clean the wall to ensure it’s free from dust and dirt.
  • Apply a base coat of the lighter color if your wall isn’t already that color. Allow it to dry completely.

2. Mark the Stripes

Using your level and measuring tape, mark the top and bottom edges of each stripe you’ve planned. Use a pencil and a straightedge to create your guidelines. Make sure these lines are level.

3. Apply Painter’s Tape

Carefully apply painter’s tape along the outside edge of the lines you’ve marked. Press the tape down firmly to prevent paint from bleeding under it. Make sure the tape follows the entire length of your lines.

4. Paint the First Stripe

Using a roller or a paintbrush, apply the darker color paint within the area between the tape lines. Be sure to paint evenly and avoid overloading the roller or brush with paint, which can lead to drips.

5. Peel Off the Tape

While the paint is still wet, carefully remove the painter’s tape at a 45-degree angle. This will help create clean, crisp edges. Be cautious not to smudge the wet paint.

6. Let It Dry

Allow the first stripe to dry completely before moving on to the next one. This typically takes a few hours, but check the paint can for specific drying times.

7. Repeat the Process

Repeat the painting, taping, and drying process for each stripe. Remember to measure and mark for consistency between stripes.

8. Touch-Ups

After all the stripes have dried, check for any imperfections or areas that need touch-ups. Use a small brush to correct any uneven lines or gaps.

Additional Tips and Tricks

  • Use a small brush for touch-ups to ensure precision.
  • Paint the lighter color first if you’re unsure about the number of coats needed for coverage.
  • Choose paint with a flat or matte finish for a classic look, or go with a satin or semi-gloss finish for a more modern appearance.

Conclusion

Painting perfectly striped walls can be a fun and rewarding DIY project. With careful planning, precise measurements, and the right techniques, you can create a stunning visual impact in any room. Whether you choose classic, bold, or subtle stripes, your perfectly painted wall will transform your space into a work of art.

5 Easy Steps to Prepare Your Canvas for Painting

When creating art that stands the test of time, proper canvas preparation is the foundation upon which your masterpiece will rest. Whether you’re an aspiring artist or an experienced painter, taking the time to prepare your canvas correctly can significantly impact the quality and longevity of your artwork. This guide will walk you through five easy steps to ensure your canvas is perfectly primed and ready for your creative expression.

Step 1: Gather Your Materials

Before diving into the canvas preparation process, gathering all the necessary materials is essential. Here’s what you’ll need:

Materials Checklist

  1. Canvas: Select a high-quality canvas that suits your painting style and desired finish.
  2. Stretcher Bars: Ensure they are sturdy and adequately support your canvas.
  3. Stapler or Tacks: To secure the canvas to the stretcher bars.
  4. Gesso: Choose between white or clear gesso based on your preferences.
  5. Sandpaper: Get the right grit for smoothing the canvas surface.

Choosing the right materials is crucial to achieving a professional outcome. Opt for the best quality canvas and stretcher bars within your budget to ensure your artwork’s durability.

Step 2: Stretch and Secure the Canvas

Center and Align

Begin by laying your canvas face down on a clean surface. Center it over the stretcher bars and ensure proper alignment. This step is critical to achieving a balanced and visually pleasing final result.

Stapling or Tacking

With the canvas centered, start securing it to the stretcher bars. Use staplers or tacks to attach the canvas, working from the center outwards. Make sure to maintain even tension as you go. The key here is to achieve a taut and wrinkle-free canvas surface.

Step 3: Apply Gesso

Apply gesso evenly to the canvas using a wide brush. Start with thin layers and allow each layer to dry before applying the next. Multiple layers of gesso will provide a smoother surface, ideal for painting. Be patient during this process, as thorough priming is key to achieving professional results.

Step 4: Sand and Smooth the Surface

After the gesso has dried completely, it’s time to sand the canvas surface. This step is essential for achieving a smooth and receptive canvas for your paint. Follow these steps for optimal results:

  1. Select the appropriate grit of sandpaper (usually fine to medium).
  2. Gently sand the entire canvas surface in a circular motion, paying attention to any rough spots or imperfections.
  3. After sanding, use a clean cloth or brush to remove any dust or debris from the canvas.

A smooth canvas surface enhances paint adhesion and allows for more precise brushwork and blending.

Step 5: Final Checks and Recommendations

Before you embark on your painting journey, perform these final checks:

Tension of the Canvas

Ensure your canvas remains taut and evenly stretched across the stretcher bars. Tighten or adjust if necessary.

Even the Application of Gesso

Inspect the canvas for any unevenness or imperfections in the gesso layers. Sand lightly if needed.

Smoothness of the Surface

Run your hand gently over the canvas to confirm it’s smooth and ready for painting.

In addition to these checks, consider the following recommendations:

  1. Store prepared canvases in a clean, dust-free environment to prevent damage.
  2. Troubleshoot common canvas preparation issues, such as sagging or uneven tension.
  3. Allow the canvas to dry thoroughly before starting your painting to prevent cracks or bubbles in the paint.

In Summary

Proper canvas preparation is fundamental to the artistic process. Following these five steps will set the stage for your creativity to shine and ensure your artwork remains vibrant and beautiful for years to come. Invest the time and effort into canvas preparation, and you’ll reap the rewards of stunning, long-lasting art.

3 Ways to Choose Bedroom Paint Colors for Relaxing Sleep Spaces

Getting a good night’s sleep is essential for our overall well-being, and one often-overlooked aspect of creating a sleep-friendly environment is choosing the right bedroom paint colors. The colors you use in your bedroom can have a profound impact on the quality of your sleep and overall relaxation.

1. Embrace Soothing Neutrals

  • Versatility: Neutrals like soft grays, warm beiges, and earthy tones work well with various decor styles, ensuring that your bedroom remains timeless and adaptable to changing tastes.
  • Balanced Ambiance: Neutrals create a sense of balance and serenity in the room, reducing visual distractions and promoting relaxation.
  • Perceived Spaciousness: Lighter neutrals can make a small bedroom appear more spacious and airy, enhancing the overall feeling of tranquility.
  • Personalization: You can add personal touches and splashes of color through decor items like throw pillows, curtains, or artwork without compromising the calming atmosphere.

2. Explore Cool Blues and Greens

  • Nature’s Influence: Cool colors like blue and green are reminiscent of natural environments, connecting your bedroom to feelings of outdoor serenity.
  • Calming Effect: These colors are scientifically proven to lower heart rates and reduce stress, making them ideal for sleep-promoting environments.
  • Color Variations: You can experiment with various shades of blue and green to find the one that resonates best with your desired level of tranquility.
  • Harmony: Combining different shades of cool colors can create a visually pleasing and harmonious look that enhances relaxation.

3. Balance Warm and Cool Tones

  • Cozy Comfort: Warm colors like soft yellows, gentle pinks, or lavender add a sense of comfort and coziness to your bedroom.
  • Inviting Atmosphere: These warm tones can make your bedroom feel more inviting and homely, appealing to those who prefer a cozier sleep space.
  • Cool Color Dominance: Use cool colors as the dominant choice for the walls to maintain the calming effect while introducing warm tones through decor elements like bedding, curtains, or accents.
  • Visual Interest: Combining warm and cool tones creates a balanced visual palette, ensuring your bedroom is both relaxing and aesthetically pleasing.

Choosing the right bedroom paint colors is a crucial step in creating a relaxing sleep space. Whether you prefer soothing neutrals, cool blues and greens, or a combination of warm and cool tones, your choice of colors can significantly impact your sleep quality and overall well-being. So, take the time to explore different color options and create a bedroom that promotes restful slumber and a peaceful sanctuary for relaxation. Sweet dreams!

Embarking on a Painting Project

When embarking on a bedroom painting project, start by testing paint swatches on your walls to find the ideal color that suits your lighting and ambiance preferences throughout the day. Choose a paint finish that aligns with your bedroom’s practical needs, opting for matte finishes for coziness and satin or eggshell finishes for durability. For added depth and visual interest, consider creating an accent wall with a contrasting or darker shade. Don’t forget to pay attention to the ceiling; a lighter shade or a soft tint of your wall color can make the room feel more spacious and welcoming. Finally, invest in quality paint and tools to ensure a smooth application and long-lasting, satisfying results.

5 Surprising Areas You Shouldn’t Forget to Paint in Your Home

When it comes to home painting, walls, and furniture often take center stage. However, there are several lesser-known areas that, when painted thoughtfully, can contribute significantly to your home’s overall aesthetics. This guide delves into five surprising areas you should remember to paint, uncovering their potential to transform your living space into a cohesive and stylish haven.

Photo by Flow Clark on Unsplash

1. Ceilings

Creating an Illusion of Space

The ceiling, often ignored, can be a game-changer in your interior design. A painted ceiling can visually alter the perception of a room’s dimensions. Lighter shades can open a space, while darker hues evoke a cozy and intimate ambiance.

Choosing the Right Hue and Finish

When selecting a ceiling color, consider the room’s purpose and the overall color scheme. Opt for hues that complement your walls while maintaining contrast. Matte or eggshell finishes are popular for ceilings as they minimize glare and imperfections, promoting a serene environment.

2. Interior Doors and Trim

Adding Definition and Character

Interior doors and trim play a subtle but crucial role in defining a room’s character. Painting them offers a chance to add elegance and cohesion to your space. Opt for a hue that complements your walls, harmonizing or contrasting for visual interest.

A Cohesive Design Scheme

A cohesive color scheme throughout your home can create a harmonious flow. Choose a color palette that carries from room to room, unifying the design. A crisp white trim against neutral walls offers timeless sophistication, while bold trim colors can vibrate your space.

3. Closets

A Fresh Perspective on Storage

Closets often serve as hidden storage spaces, but painting them can transform them into functional and inviting areas. A fresh coat of paint improves aesthetics and brightens the space, making it easier to find belongings.

Playing with Colors

Don’t shy away from experimenting with colors in your closets. A contrasting color or a playful pattern can turn closets into unexpected focal points. A bold interior can inspire a sense of order and organization, making your daily routine more pleasant.

4. Radiators and Heaters

Merging Utility with Style

Radiators and heaters, typically seen as functional necessities, can become design elements with a touch of paint. Choose a paint that can withstand heat and choose a color that either blends in with your walls or stands out as a deliberate design choice.

Industrial Chic Aesthetics

Embracing exposed pipes and radiators as part of the design is a growing trend in interior design. A coat of paint can transform these industrial elements into stylish features. Dark hues lend a touch of elegance, while metallic shades can enhance the industrial chic aesthetic.

5. Exposed Pipes and Ducts

Incorporating Industrial Elements

Exposed pipes and ducts are often seen in modern industrial spaces, but this aesthetic can also be adapted to residential interiors. A fresh coat of paint on these elements can turn them into intentional design elements rather than mere utilities.

Painting for a Unified Look

To incorporate exposed pipes and ducts into your design, choose a color that complements your overall interior scheme. A muted shade can seamlessly blend in, while a bold color can make a striking statement, transforming utilitarian elements into design features.

Unleash the Potential of Hidden Painting Opportunities

As you embark on your home painting journey, remember that the canvas extends beyond walls and furniture. You can create a holistic and visually pleasing living space by considering often overlooked areas, such as ceilings, doors, closets, radiators, and exposed elements. The impact of these thoughtful paint choices can be far-reaching, enhancing your home’s aesthetics and offering a new level of design cohesion.

Trust and Transparency: The Cornerstones of a Reputable Painting Company in Milford, CT

When it comes to transforming your home or business with a fresh coat of paint, finding a reliable painting company in Milford, CT, is crucial. With numerous options available, distinguishing a reputable company can be challenging. In this article, we will explore the two cornerstones that set apart a trustworthy painting company in Milford, CT — trust and transparency.

Building Trust with Clients

Establishing trust begins with a painting company’s online presence and reputation. A reputable painting company in Milford, CT, will have a strong online presence, showcasing positive customer reviews and testimonials from satisfied clients. These real-life experiences serve as a testament to the company’s commitment to excellence.

A reputable painting company also emphasizes transparency by showcasing a portfolio of completed projects in Milford, CT. By highlighting successful outcomes and client satisfaction, they offer transparency in their capabilities and work quality. Furthermore, such companies provide detailed estimates in writing, ensuring there are no hidden costs that may come as a surprise during the project.

Transparent Business Practices

Licensing and certifications play a vital role in earning the trust of customers. A reputable painting company in Milford, CT, will be licensed and insured, giving clients the peace of mind that they are working with a legitimate and responsible business. Displaying certifications and affiliations on their website or marketing materials further solidifies their credibility.

Moreover, transparency extends to the company’s commitment to environmental and safety policies. By using eco-friendly paints and materials, a reputable painting company demonstrates its dedication to sustainable practices. Additionally, implementing safety measures for both their employees and clients ensures a secure working environment.

Communication and Customer Support

Open communication is the bedrock of trust. A reputable painting company maintains clear and constant communication with clients throughout the project. They are readily available to address any concerns or queries, ensuring that clients feel heard and valued.

Exceptional customer support is another hallmark of a trustworthy painting company in Milford, CT. By providing top-notch service even after the project is complete, they show their commitment to building long-lasting relationships with their clients.

Employee Training and Background Checks

A reputable painting company understands the significance of having skilled and trustworthy painters on its team. To ensure this, they conduct thorough background checks and reference screenings during their hiring process. By investing in ongoing training for their painters, they maintain a high standard of professionalism and workmanship.

Community Involvement and Giving Back

A painting company that is actively engaged with the local Milford, CT, community demonstrates its dedication to making a positive impact. By participating in community events and supporting local charities and organizations, they show that they are more than just a business – they are a contributing member of the community.

Conclusion

Choosing a reputable painting company in Milford, CT, goes beyond the quality of their work. Trust and transparency are the cornerstones that set apart the best in the industry. From showcasing a strong online reputation to emphasizing environmental responsibility and community engagement, a trustworthy painting company prioritizes the satisfaction and well-being of its clients above all else. So, when you’re in need of a painting company in Milford, CT, remember to look for these two crucial qualities to ensure a successful and gratifying painting experience.

Choose a Trustworthy Painting Company in Milford, CT!

Don’t settle for anything less than excellence when it comes to your house painting needs. Trust the skilled and reputable house painters at Professional House Painters to transform your home with a fresh and vibrant touch. With a strong focus on trust and transparency, their team of experienced professionals ensures that your painting project is executed with precision and care. Whether it’s a residential or commercial painting endeavor in Milford, CT, their commitment to open communication, detailed estimates, and eco-friendly practices guarantees a satisfying experience from start to finish. Contact them today for a consultation!

Professional House Painters

570 Boston Post Rd unit 108, Milford, CT 06460, United States

Phone Number: +12034578959

https://housepainter-westhartfordct.com/housepainter-milfordct/

The Power of a Fresh Coat: How Painting Can Increase Property Value

When it comes to homeowners and real estate investors, property value is a crucial factor that can significantly impact their financial success. One often overlooked yet powerful tool for increasing property value is the simple act of painting. A fresh coat of paint can work wonders in enhancing a property’s aesthetics and overall appeal. In this article, we will explore how painting can transform a property and drive its value to new heights.

The Visual Impact of Paint

First impressions matter, especially in the real estate market. Curb appeal plays a vital role in attracting potential buyers or tenants, and painting plays a pivotal role in creating a positive initial impression. A well-painted property immediately catches the eye and evokes a sense of pride and care. Additionally, colors have a profound impact on human perception and emotions. Choosing the right hues can create a welcoming atmosphere that resonates with prospective buyers or tenants.

Protection and Maintenance

Beyond its visual impact, paint serves as a protective shield against various environmental factors. Sun, rain, and pests can wreak havoc on a property’s exterior, leading to costly damage. Regular painting acts as a barrier, preventing deterioration such as rot, mold, and corrosion. By investing in timely paint maintenance, property owners can save themselves from hefty repair or replacement expenses down the line.

Updating Outdated or Dated Spaces

Trends change, and outdated interiors or exteriors can drag down a property’s appeal. However, painting offers a cost-effective solution to breathe new life into these spaces. With a fresh coat of paint, outdated areas can be transformed into vibrant, modern, and inviting environments. Whether it’s a bold color choice for an accent wall or a soothing palette for a serene bedroom, the right paint can work wonders in revitalizing a property’s aesthetic appeal.

Increased Market Competitiveness

In a competitive real estate market, standing out is crucial. A freshly painted property immediately distinguishes itself from the crowd. Potential buyers or tenants are drawn to properties that exude pride of ownership and have been well-maintained. The visual appeal created by a quality paint job can significantly increase a property’s perceived value, making it more attractive to potential buyers or tenants.

Return on Investment (ROI)

Investing in a fresh coat of paint can yield substantial returns on investment. Studies have consistently shown a positive correlation between painting and property value. According to a survey conducted by a leading real estate association, properties with updated paintwork tend to sell at higher prices and spend less time on the market. Painting is not only an investment in aesthetics but also a strategic move to maximize long-term financial gains.

DIY vs. Professional Painting

While some may consider painting a DIY project, hiring professional painters can offer distinct advantages. Expertise, time savings, and superior quality are just a few benefits of entrusting the job to professionals. Their skill and experience ensure flawless finishes and efficient execution, resulting in a high-quality paint job that enhances property value.

Cost Considerations

When budgeting for a painting project, several factors come into play. The size of the property, complexity of the paint job, and desired quality all influence the overall cost. It’s essential to consider these factors and weigh the long-term benefits against the initial investment. While painting may require an upfront expense, it is a cost-effective investment that can yield significant returns.

Conclusion

A fresh coat of paint holds immense power in increasing property value. Not only does it create a visually appealing environment that attracts potential buyers or tenants, but it also protects the property from environmental damage. The updated look and feel of a painted property can enhance its market competitiveness, leading to higher rental rates or selling prices. Painting is a wise investment that offers a substantial return on investment. So, whether you’re looking to sell, rent, or simply improve your property, consider the transformative power of a fresh coat of paint.

Peace of Mind: Why Professional House Painters is a Smart Choice for Farmington Residents

Farmington, CT, is a town where timeless beauty and community spirit intertwine. As a homeowner here, you take pride in the appearance of your property, seeking to enhance its allure and preserve its charm. When it comes to painting your house, finding peace of mind is essential. That’s why engaging professional house painters in Farmington is a smart choice that ensures your home’s transformation is handled with expertise, precision, and a touch of magic. In this guest post, we will explore the numerous advantages of hiring professional house painters in Farmington, CT, as they unlock the true potential of your home, leaving you with a beautifully finished masterpiece that exudes elegance and withstands the test of time.

Peace of Mind in House Painting Projects

House painting projects can often be overwhelming and time-consuming for homeowners. From choosing the right colors to prepping the surfaces and achieving flawless finishes, the process demands attention to detail. Homeowners can enjoy peace of mind throughout the project by hiring professional house painters in Farmington, CT. They can relax, knowing that their home is in the hands of experienced professionals who will deliver exceptional results.

Expertise and Experience of Professional House Painters

When it comes to house painting, professional house painters in Farmington, CT, bring a wealth of expertise and experience to the table. These skilled professionals have in-depth knowledge of various painting techniques, surface preparation, and application methods. Their experience in handling different types of painting projects ensures that homeowners receive top-notch results, transforming their homes into visual masterpieces.

Access to Quality Materials and Equipment

Professional house painters in Farmington, CT, have access to high-quality paints, tools, and equipment, which can significantly impact the final outcome of a painting project. By utilizing premium materials, these professionals ensure that the paint job not only looks visually appealing but also lasts longer and withstands the test of time. Homeowners can trust that their investment in professional house painters will yield durable and aesthetically pleasing results.

Time-Saving and Efficient Painting Process

One of the most significant advantages of hiring professional house painters in Farmington, CT, is the time saved in completing the project. These experts have developed efficient processes and techniques over the years, allowing them to complete painting projects promptly without compromising on quality. By delegating the painting tasks to professionals, homeowners can focus on other important aspects of their lives while their homes are transformed with a fresh coat of paint.

Insurance Coverage and Protection

Accidents can happen during any house painting project, and liability issues can become a significant concern for homeowners. However, by engaging professional house painters in Farmington, CT, homeowners can rest easy knowing that they are protected. Reputable painting companies carry liability insurance, which covers any accidental damages or injuries that may occur during the painting process. This insurance coverage provides an added layer of protection for both homeowners and the painters.

Attention to Detail and Meticulous Workmanship

Professional house painters in Farmington, CT, understand the importance of attention to detail in achieving flawless results. From meticulously preparing the surfaces to ensuring even application of paint, these professionals leave no stone unturned. Their meticulous workmanship not only enhances the overall appearance of the property but also adds value to it. With professional house painters, homeowners can expect a beautifully finished paint job that exceeds their expectations.

Transform Your Farmington Home with Professional House Painters! 

Take the first step towards unveiling the true beauty of your Farmington home. With the expertise, attention to detail, and commitment to customer satisfaction of Farmington Professional House Painters, you can enjoy a stress-free painting experience and remarkable results. Their team of skilled house painters will transform your house into a captivating masterpiece that reflects your personal style while enhancing its overall appeal and value. Don’t settle for anything less than exceptional. Contact them today and let them bring your vision to life with precision, professionalism, and a touch of magic!

Farmington Professional House Painters

222 Main St Unit 104, Farmington, CT 06032, United States

Phone: +18609012316

https://housepainter-westhartfordct.com/housepainter-farmingtonct/